Showing posts with label Chocolate. Show all posts

Friday, February 1, 2013

S'Mores Pie

If you know me well enough, you know my deep and abiding love for S'mores. They are the only reason I tolerate camping, and it always makes me a little sad at the end of summer. No longer--I can make this pie any time and have S'mores all throughout the year. I don't know if that's such a good thing, which is probably why I let this recipe sit for awhile before I made it. But it was so amazing when I did. Very easy and satisfying.

Printable Recipe

S'mores Pie


1/2 cup butter, softened
3/4 cup sugar
1 large egg
1 teaspoon vanilla
1 cup all-purpose flour
1 cup graham cracker crumbs
1 teaspoon baking powder
1 (7 ounce) jar Marshmallow Creme (do NOT use regular marshmallows)
4 Regular sized Hersheys Bars, broken into pieces
wax or parchment paper


Preheat oven to 350 degrees. Spray a 9 inch glass pie pan with baking spray.

Beat butter and sugar together until fluffy and combined.

Add egg and vanilla until incorporated.

On low speed add in flour, graham cracker crumbs and baking powder. Divide the dough in half.

Press half of the dough in the bottom and sides of the prepared pie pan.

Evenly spread the Marshmallow Creme over the bottom of crust.

Spread the broken chocolate pieces on top of the Marshmallow Creme.

Form the remaining dough into a ball and place it on a piece of wax or parchment paper.

Top with another piece of wax or parchment paper and flatten into a 9 inch circle with a rolling pin.

Carefully peel off the top piece of wax paper.

Flip the crust onto the top of pie and peel off the other piece of paper.

Pinch the dough together to form the crust.

Bake for 20 minutes or until lightly browned.

Cool until just slightly warm and then slice and serve.

Monday, May 28, 2012

Caramel S'more Bars

When I saw this a few days ago, I already had everything planned out that I was taking to the barbecue on Memorial Day. But I'm pretty susceptible to the powers of suggestion, so when I read that these bars would make our get together "spectacular", I had to agree. And it doesn't hurt that I LOVE S'mores. Which means I'm having a love affair with these bars. Wish I could share them with you all, but you'll just have to whip up your own!

The only thing I had an issue with was the caramel sauce. I had to let it boil a little longer than this says because it was still pretty liquidy (I had already added the vanilla and salt, and was letting it cool, but it wasn't setting up). For some reason, there are issues anytime I make a recipe from someone in Utah. I'm guessing there's some kind of climate difference that I'm not taking into account. Or that it's been raining. Anybody have a degree in food chemistry? I'm leaving the recipe the same, but you might have to add a couple extra minutes of boiling.

Printable Recipe


Caramel S'more Bars


Prep. Time: 10 min.  Bake Time: 13 mins

 14 whole graham crackers (about 1 1/2 packages)
1 (12 ounce) package milk chocolate chips
1/2 cup pecans, chopped
5 cups mini marshmallows
1 cup butter
1 cup brown sugar
1 tsp. vanilla
dash salt


Preheat oven to 350.

Place a Silpat or parchment paper on a large cookie sheet.

Break each graham cracker in half and lay it out on the pan. Don't worry if the edges of the crackers don't all touch; the caramel will help to bind them together.

Spread the chocolate chips out evenly over the crackers and sprinkle them with the chopped pecans.

Toss the mini marshmallows evenly over the top of the chocolate.

Place butter and brown sugar in a medium sized sauce pan.

Heat it on the stove over medium high heat, stirring occasionally.

Once the mixture starts to boil and the ingredients have combined well and are no longer separated, remove the pan from the heat, and stir in 1 teaspoon vanilla and a dash of salt. (You might need to boil it a little longer and then allow to cool just a bit so it can set up).

Drizzle the caramel all over the top of the marshmallows.

Bake at 350 for 12-13 minutes. You want to watch for the marshmallows to puff up and get golden brown along the tops.

Remove the pan from the oven and let the bars cool completely before cutting. They are much easier to cut if the chocolate and caramel has had time to set up.

After the bars have come to room temperature, you can put the pan in the fridge for 10 minutes or so for the chocolate to set up, or if you'd like them a little more gooey, skip the refrigeration and eat them as is.

Makes 30 to 40 bars.

Saturday, March 31, 2012

Magic In the Middle Cookies

I was pleasantly surprised with these cookies (although I shouldn't be--I got it from one of my favorite blogs). They were even better than expected--a chocolate cookie holding a soft peanut butter filling. And for once, when they say it makes 26, it really does make 26!

Printable Recipe

Magic In the Middle Cookies

 Chocolate Dough
1 1/2 cups all-purpose flour
1/2 cup unsweetened cocoa powder
1/2 teaspoon baking soda
1/4 teaspoon salt
1/2 cup granulated sugar (plus extra for dredging)
1/2 cup brown sugar
1/2 cup (1 stick) butter, softened
1/4 cup smooth peanut butter
1 teaspoon vanilla extract
1 large egg plus 1 large egg yolk

Peanut Butter Filling
3/4 cup peanut butter, crunchy or smooth, your choice
3/4 cup (3 ounces) confectioners' sugar


Preheat the oven to 375°F. Lightly grease (or line with parchment) two baking sheets.

In a medium-sized bowl, whisk together the flour, cocoa, baking soda and salt.

In another medium-sized mixing bowl, beat together the sugars, butter, and peanut butter until light and fluffy.

Add the vanilla and the eggs, beating to combine.

Then stir in the dry ingredients, blending well.

In a small bowl, stir together the peanut butter and confectioners sugar until smooth.

With floured hands or a teaspoon scoop, roll the filling into 26 one-inch balls. (I use the natural peanut butter, and it's not sticky at this point, so I don't usually flour my hands. I'm leaving it in though, in case regular peanut butter makes a stickier filling.)

Scoop 1 tablespoon of the dough (a lump about the size of a walnut), make an indentation in the center with your finger and place one of the peanut butter balls into the indentation.

Bring the cookie dough up and over the filling, pressing the edges together cover the center; roll the cookie in the palms of your hand to smooth it out.

Roll rounded cookie in granulated sugar, and place on the prepared baking sheets, leaving about 2 inches between cookies.

Repeat with the remaining dough and filling.

Use the bottom of a drinking glass to flatten each cookie to about 1/2-inch thick.

Bake the cookies for 7 to 9 minutes, or until they're set and you can smell chocolate.

Remove them from the oven, and cool on a rack.

Makes 26 cookies.

Saturday, March 17, 2012

Cream Cheese Brownies

These were so, so yummy! Can you tell they were part of our Valentine's Day meal? The original recipe calls them Red Velvet Brownies, but technically most red velvet use vinegar and/or buttermilk to make the red coloring. I don't count adding red food dye as qualifying for red velvet. So I'm calling them Cream Cheese Brownies. Regardless, they are a tasty concoction, a moist brownie right in the middle between being fudgy and cakey. Next time I'll leave out the red dye--even with using the gel, it took quite a bit to get them red, and I could really taste it. But they sure were pretty!

Printable Recipe

 Cream Cheese Brownies


Prep. Time: 20 mins.   Bake Time: 45-55 mins.

Brownie Layer:
1 cup butter, melted
2 cups sugar
1/3 cup unsweetened cocoa powder
4 eggs
2 t vanilla
1-1/2 cups flour
1/2 tsp salt
1 tsp red food coloring gel (optional)
1/2 cup semi sweet chocolate chips (I used chocolate chunks, and they were divine!)

Cream Cheese Layer:
1 (8 ounce) package cream cheese, softened
1/2 cup sugar
1 egg
1 tsp vanilla 


BROWNIE LAYER

Place 1 cup melted butter, 2 cups sugar and 1/3 cup unsweetened cocoa into your stand mixer, or large mixing bowl. Mix it until well combined, about 2 minutes. 

Crack one egg and add it to the batter. Mix until the egg is incorporated. Repeat with the three remaining eggs, mixing them into the batter one at a time.  

Add two teaspoons vanilla to the batter and mix it in. 

Put 1-1/2 cups flour and 1/2 teaspoon salt into a small bowl and whisk with a fork to combine the two. Add these dry ingredients to your batter and mix until they are well combined.

(If you want to make them red, add 1 teaspoon red food coloring gel to the batter and mix until the batter is a nice color.)

Toss in 1/2 cup semi sweet chocolate chips and mix until combined. 

Line a 9x13 pan with wax paper, parchment paper or tin foil and spray it with cooking spray. This will help you lift the brownies out of the pan when they have cooled and are ready to cut. 

Spread the batter out evenly in the pan.


CREAM CHEESE LAYER

Place 1 package softened cream cheese into your stand mixer or medium sized mixing bowl. Beat it until nice and smooth.  

Add 1/2 cup sugar, 1 egg and 1 teaspoon vanilla. Mix until all ingredients are well combined. 

Drop the cream cheese mixture onto the brownie layer in spoonfuls. 

Drag a knife through both layers to create a marbling effect.

Bake at 350 degrees for 45-55 minutes or until a toothpick inserted into the middle comes out clean. 

Let the brownies cool on a wire rack, then lift them out of the pan, cut and serve.

Wednesday, March 14, 2012

Chocolate Chess Pie

In honor of Pi Day, I figured we had to celebrate with pie! This is one of my favorites, and it's a recipe my grandma found several years ago. The original name was Pie In The Sky, but when I looked up the meaning of that phrase, it said, "Refers to a prospect of future happiness which is unlikely ever to be realized." Which seems kind of like a downer. After looking around, I think it's actually a Chocolate Chess Pie. The top is kind of like a fudgy brownie, and the middle layer is, well, custardy. Yep, that's a word now. If anyone has something better, feel free to email me. Otherwise, make this baby up, and enjoy 3.14!

Printable Recipe


Chocolate Chess Pie


1/4 cup margarine
1-1/2 squares bittersweet chocolate
1-1/2 cups sugar
1 Tbsp. flour
2 eggs, beaten
1/2 cup milk
1 tsp. vanilla
1/8 tsp. salt
1 unbaked pie shell (regular, not deep dish)


Preheat oven to 350.

Melt margarine and chocolate together, either in a double boiler or microwave. Mix well.

In a large bowl, combine remaining ingredients. Mix well.

Add chocolate mixture to custard mixture, and stir well for several minutes.

Pour into pie shell.

Bake at 350 for 30 to 40 minutes.

Makes 8 servings.

Saturday, March 10, 2012

Pumpkin Chocolate Chip Muffins

After making another pumpkin recipe, I had an extra cup of pumpkin that I couldn't figure out how to use. A quick search brought up this recipe. Originally, she used regular chocolate chips, but we've been using chunks lately, and they seemed to give the muffins just the amount of chocolate they needed. She also used 1/3 cup of applesauce instead of oil, but I was all out, so that's your call. I sent a few muffins with Anthony to work, and the reactions from the guys ranged from swearing (in a good way, if that's possible) to an offer from one to divorce his wife and move in with us. I think this recipe is a keeper.

Printable Recipe

 Pumpkin Chocolate Chip Muffins
 

1 cup canned pumpkin
1/3 cup vegetable oil
2 large eggs
1/2 tsp. cinnamon
1/4 tsp. nutmeg
1-1/4 cup sugar
1-1/2 cup flour
1/2 tsp. salt
1 tsp. baking powder
1/2 tsp. baking soda
3/4 cup semisweet chocolate chunks


Preheat oven to 350 degrees. Grease muffin tins.

Whisk together pumpkin, oil, eggs, cinnamon, nutmeg and sugar.

In a separate bowl, combine flour, salt, baking powder and baking soda.

Stir into pumpkin mixture until well mixed.

Add chocolate chips, and stir to combine.

Fill muffin cups 3/4 full.

Bake 20-25 minutes.

Allow to cool in the pan for two minutes. Transfer to a baking rack to finish cooling.

Makes 1 1/2 dozen muffins.

Saturday, March 3, 2012

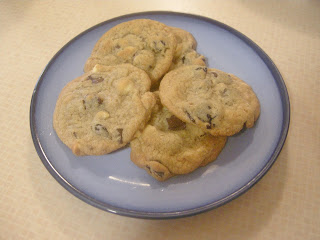
Cherry Chocolate Chip Cookies

I have never been one to hoard my recipes, but this one is hard for me to post. While I can easily follow someone else's recipe, I'm not very creative. These cookies are one of the few recipes that I came up with on my own, so I'm tempted to hold onto them. But in the end, they're just too good not to share.

For the cherries, we love Traverse Bay's Montmorency Dried Cherries that you can get on Amazon. They're wonderful for baking, adding to oatmeal, or just eating by the handful. And they're perfect for food storage! They fluctuate in price, but when they're around $20 for 4 lbs, it's a better price than I've found in any store. If you don't want to wait, or you don't feel like you need that many dried cherries, I'm sure you can find something comparable at any grocery store. My friend Missy used chopped up Maraschino cherries, and they tasted great, but the cookies were too sweet. I think using a tart cherry is probably the best way to go.

In Alaska, they are best the first day (nothing seems to last long in Alaska, except snow), so feel free to eat them all in one sitting. If you're outside of the state, I guess you can spread it out a little more.

Printable Recipe

Cherry Chocolate Chip Cookies


3/4 cup butter, softened
3/4 cup shortening
1 cup sugar
1 cup brown sugar
2 eggs
2 tsp. vanilla
3 cups flour
1 tsp. baking soda
1 tsp. salt
3/4 cup white chocolate chips
3/4 cup semi-sweet chocolate chunks
1-1/4 cups dried cherries
1 cup walnuts or pecans, chopped (optional)


Preheat oven to 375 degrees.

Cream together butter, shortening, and sugars.

Beat in the eggs one at a time, then add vanilla.

In a small bowl, combine flour, baking soda and salt. Slowly add flour mixture to the batter while beating on low.

Add both chocolates, cherries and nuts, and mix by hand until combined.

Refrigerate dough for 15 minutes.

Drop by spoonfuls onto a cookie sheet, and return the extra dough to the refrigerator between batches.

Bake for 8-10 minutes, or until lightly browned. Do not over bake.

Let cool on cookie sheet for a few minutes, then remove cookies to a wire rack to cool completely.

Makes about 5 dozen.

Wednesday, February 29, 2012

Chocolate Chip Cookie Dough Dip

I was so impressed with this recipe. I was completely expecting it to not turn out--it sounds way too healthy to possibly be good. But oh my! It definitely did not taste like chickpeas. I liked it as is, my husband preferred it chilled, the boys loved it either way. My only change was that I used oatmeal instead of flax seed, just because I ran out of flax seed and forgot to get more. We will definitely be making this again!

Printable Recipe

Chocolate Chip Cookie Dough Dip
from Green Lite Bites


1 can of chickpeas, drained and rinsed
1/8 tsp of salt
2 tsp vanilla
2 tbsp of natural peanut butter
2 tbsp honey
2-3 tbsp of oats or whole roasted flax seeds, ground
About 1/4 cup of milk
3 tbsp mini chocolate chips

Put the chickpeas, salt, vanilla, peanut butter, honey and oats or flax seeds in the food processor.

Turn on and drizzle the milk in a little at a time. I used the whole 1/4 cup.

Once smooth, fold in the chips. Reserve some to sprinkle on top.

Serve with graham crackers.

Saturday, February 25, 2012

Caramel-Pecan Brownies

I like to make desserts on Saturdays and Sundays, since everyone's at home. Usually it gets pretty hectic, and having something sweet always seems to help the mood. So welcome to Sweet Saturday!

This is the recipe you've all been waiting for. And you probably didn't even know it! These brownies have TWICE won first place at our church Chili Cook-Off and Brownie Bake-Off. They are truly one of the best brownies I've ever had, and surprisingly quick and easy to put together. I got the recipe from Kraft Foods, but I did have to make an important change at the end. They absolutely have to be refrigerated for several hours before you cut them. The caramel is much too sticky, and it just makes a mess when cutting at room temperature. I've made them multiple times, and I can't see anyway around it. Definitely use the foil like they say, and even better, use the non-stick foil; otherwise, the edges of the brownies will stick where the caramel oozes out, and you will be picking foil out of the caramel. And if you are lucky enough to own an Ulu knife, it is fabulous at cutting through these. The only problem is, every time I use it, I have to wonder if the Native Alaskans that created it are rolling in their graves. Hey, they said it was versatile.

Printable Recipe


Caramel-Pecan Brownies


4 squares unsweetened chocolate
3/4 cup  butter or margarine
2 cups sugar
4 eggs
1 cup flour
1 pkg. (14 oz.) caramels
1/3 cup whipping cream
2 cups pecan halves, divided


Preheat oven to 350°F.

In a 9x13-inch pan, place non-stick foil along the bottom; extend foil over the sides to serve as handles. If you are not using non-stick foil (although I really, really recommend you do), grease the foil.

Place chocolate and butter in a double boiler.*

On medium-low heat, melt chocolate and butter, stirring often, until chocolate is completely melted. Remove from heat.

Add sugar and eggs, and mix well.

Add flour and stir until well blended.

Spread half the batter into prepared pan.

Bake 25 min. or until the top is firm to the touch.

Meanwhile, place caramels and cream in the double boiler on medium-low heat and stir often. (You can also do this in the microwave--do 30-second intervals, then stir.)

When caramels begin to melt, stir continuously until they are completely melted.

Remove from heat and stir in 1 cup of pecans.

Spread caramel mixture over brownie layer in pan; cover with remaining brownie batter. Don't worry if some of the caramel is visible.

Sprinkle the remaining nuts on top.

Bake 30 min. or until top is firm to the touch.

Cool in pan on wire rack.

When brownies are at room temperature, refrigerate for 2 hours.

Lift brownies from pan with foil handles before cutting into squares.

Makes 24 servings.


*You can easily make your own double boiler. This is the way I do it--Double Boiler